This is a how2 so if it can be moved ta.
This guide applies to cars from 1998 onwards (mini-facelift models), it maybe the same for '94-98 cars but i am unsure if the locking motor is the same.
Tools needed* 9mm Socket and extension bar
* T40 Torx
* Replacement Motor Part Number: 90493702 - (scrappy is a good source for these)
Car Featured2001 Facelift 2.2 CD
VideoThe car featured had the classic 'lazy' door motor problem as seen in this short video clip (watch the right hand side lock, or fail to lock should i say):
http://images.omegaowners.com/images/guides/door_lock_motor/video.htmDoor Card RemovalYou first need to remove the door card, see here for the guides on how to do that:
Facelift:
http://www.omegaowners.com/forum/index.php?topic=90514.0Pre-facelift:
http://www.omegaowners.com/forum/index.php?topic=90556.0Lock Replacement
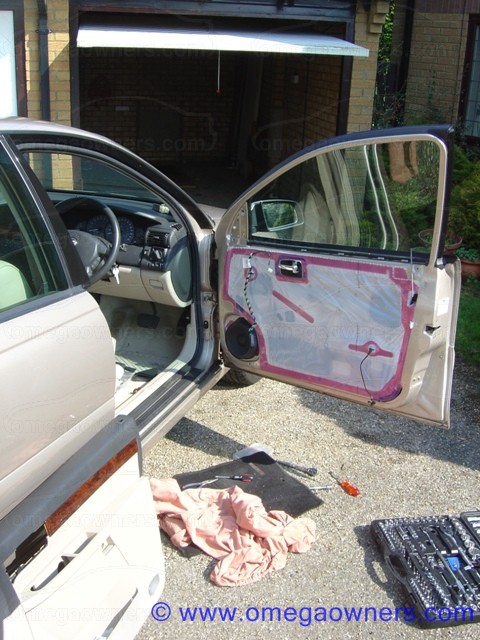
Now with the door card removed you can now see the plastic membrane that protects the inner parts of the door, this should be air-tight as possible but often its not. Its sealed with a soft glue:

Carefully peal back the plastic as shown.
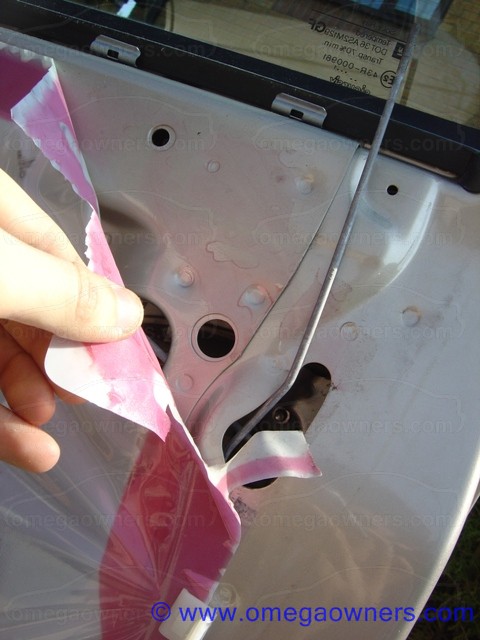
With the plastic pealed back the door is now exposed, the red circle indicates the rough location of the door lock motor.

Looking inside the door you can see the motor:
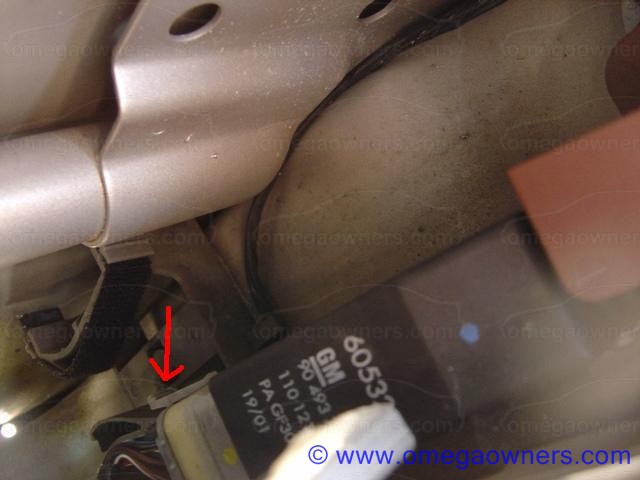
Its best at this stage to disconnect the motor, reach in and unclip the two plastic clips either side of the loom and slide it off.
Now you need to remove the door handle, remove the two 8mm nuts holding this in:
(be careful not to drop them!)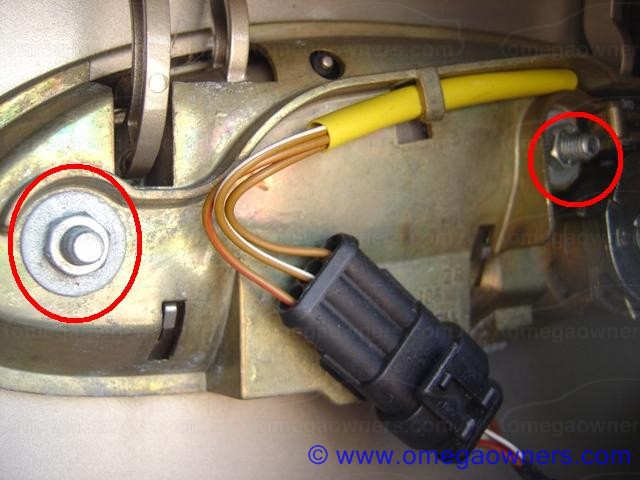
Use a socket on an extension bar to reach the back one, up the top right is a bar which connects to the motor, this needs to be unclipped and removed, also disconnect the loom that goes to the key lock:
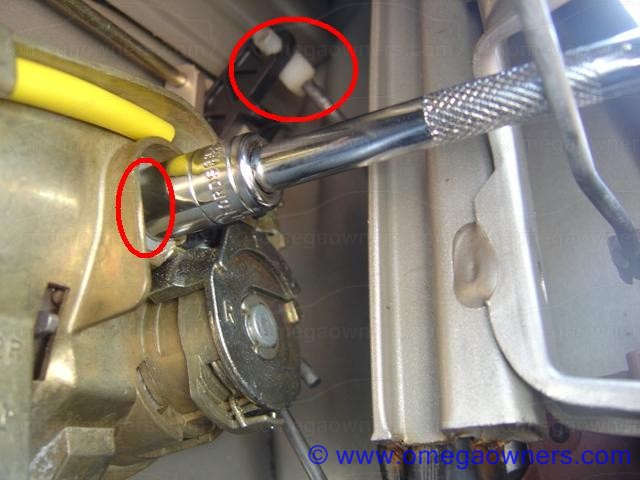

The door handle is removed
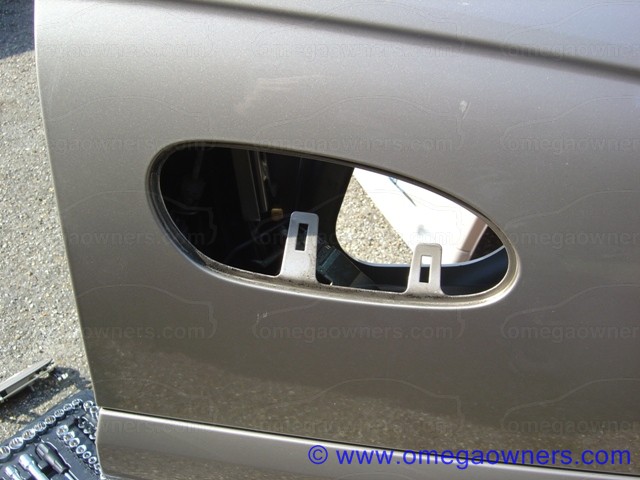
With the door handle removed, disconnect the rod which connects to the key section... take careful note of how this connects.

This bar comes from the handle inside the car to open, lift up the brown plastic clip in the direction shown and slide the rod away (outwards). Similar to clip for the door handle earlier.

Now you can release the locking assembly, do this by removing the 3 Torx 40 bolts:
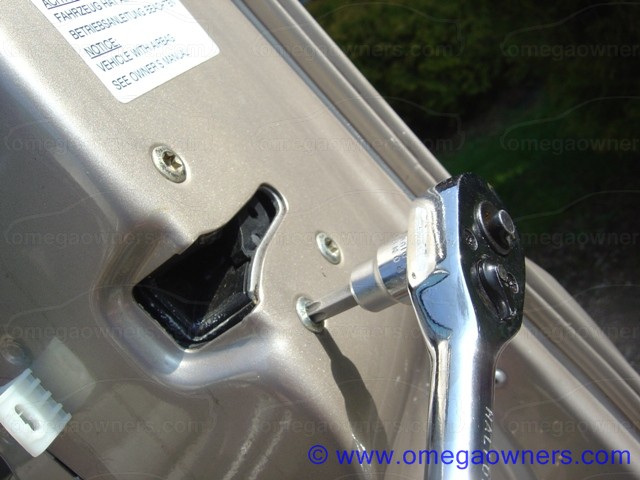
Now with some gentle wiggling and more wiggling the motor assembly can be brought to the position shown below, it is possible to remove the whole assembly but its not needed. Just get it to the position shown below:
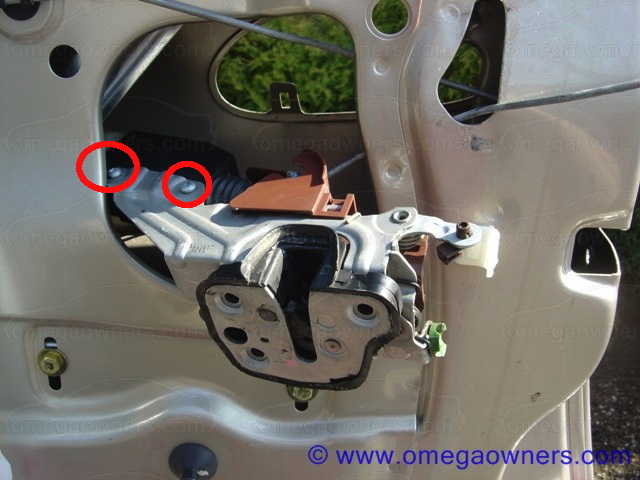
Now remove the 2 screws circled and release the old motor, replace it and re-assemble.
When putting it back together, make sure the rod to the key lock goes back correctly, if this does not it will be too stiff and give you the same symptoms as before.

 Author
Topic: pre-facelift & facelift door lock replacement (Read 14118 times)

